
Learn Fundamentals of Java Programming “Write Hello World Java Program” Lesson 2
Write a simple Java program that prints a Welcome Message (“Hello World”) on the screen. Since this will be your first Java program, you will first need to setup the programming environment (Refer to Appendix A for installation and starting NetBeans).
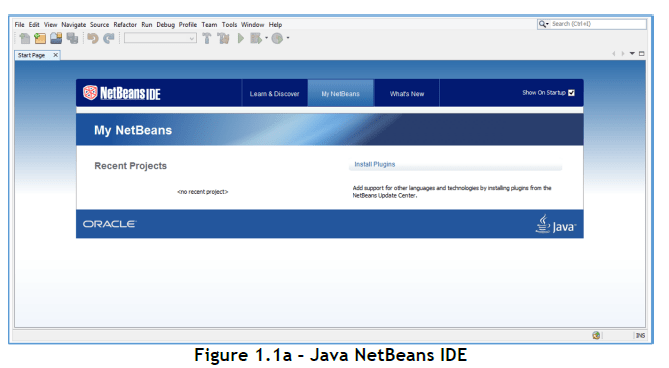
Step 1: Double click the NetBeans icon on your computer to start NetBeans. Java will open the NetBeans IDE (Figure 1.1a).
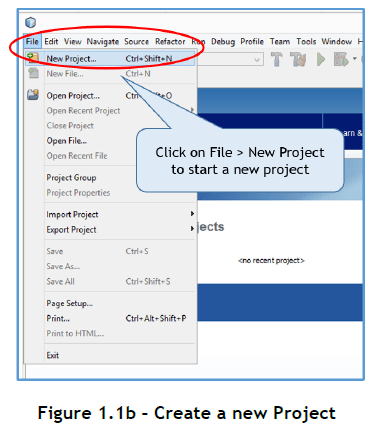
Step 2: All development in NetBeans is placed within Projects, so we begin a new Project. In the IDE click File > New Project (Ctrl + Shift + N) (Figure 1.1b).
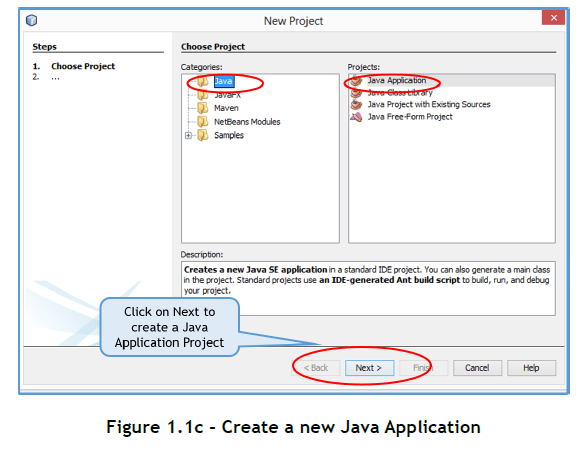
Step 3: In the New Project dialog box that appears, under the Categories list, select Java and under the Projects list select Java Application (they should be already selected). Click on Next to create a new Java Application Project (Figure 1.1c).
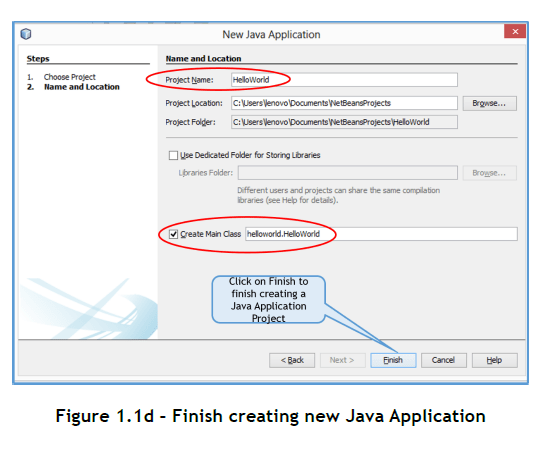
Step 4: In the New Java Application dialog box that appears, in the Project Name field, type a name for the Project (Figure 1.1d). Here we have named the Project “HelloWorld”. When you type the name of the project, the Project Folder field also changes automatically. So does the Create Main Class field. You can optionally change the Project Location and the Project Folder by clicking the Browse button. Click on Finish to finish creating the Java Application Project and to return back to the IDE.
On the left side of the NetBeans IDE, observe the Projects tab (Figure 1.1e). (If you can’t see it, click Windows > Projects on the menu bar).
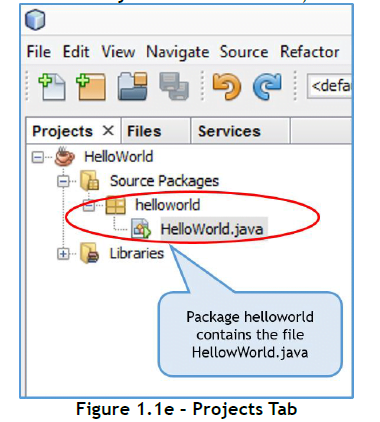
Notice that a source code file called HelloWorld.java has been created in a package called helloworld. On the right side of the IDE is the code editor window where the Java program code in the HelloWorld.java file is displayed. NetBeans has already filled in some code for you (Figure 1.1f).
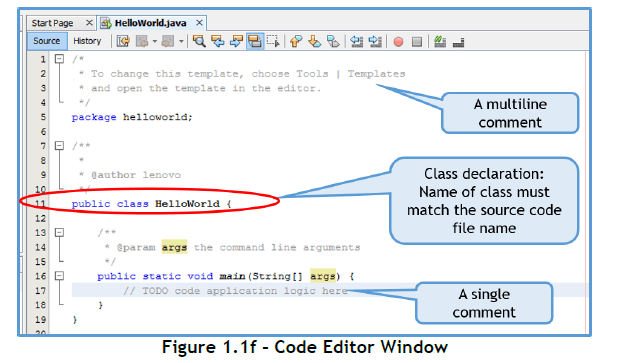
Observe that quite a bit of the code in the code editor is greyed out. All the grey parts are comments. Comments are used in code by programmers to document their programs – to provide explanatory notes to other people who read the code. This is especially useful in the real world, where large programs are written by one programmer and maintained by other programmers. You can write comments in a Java program in the following two ways:
Beginning a comment line with two consecutive forward slashes (//)
Writing the comment between the symbols /* and */
The former method is used for single line comments while the latter is generally preferred for multiple line comments. Comments are used for enhancing the readability of code and are ignored by the compiler when compiling a file.
If we ignore the comments, the HelloWorld.java program is as below:
package helloworld;
public class HelloWorld
{
public static void main(String[] args) {
}
}
Notice that the first line in the program is a package statement. A package in java is a group of related classes. In our program this statement declares that the HelloWorld.java program is part of the helloworld package. All classes in a package can share their data and code.
The next line declares a class called HelloWorld. Java demands that the class name should be the same as the source file name. However the package name can be different from either the class or the source file name. NetBeans, by default, names the package with the same name as the project, except that it is in all lower case.
The contents of a class are enclosed within curly braces. Within the contents of the HelloWorld class, a method called main has been declared. A method is a group of statements written to perform a specific task. The method body is enclosed within a pair of curly braces and contains the statements that the method will execute. main is a special method that every Java application must have. When you run a program, the statements in the main method are the first to be executed. The main method in the HelloWorld class has only a single line comment within it.
// TODO code application logic here
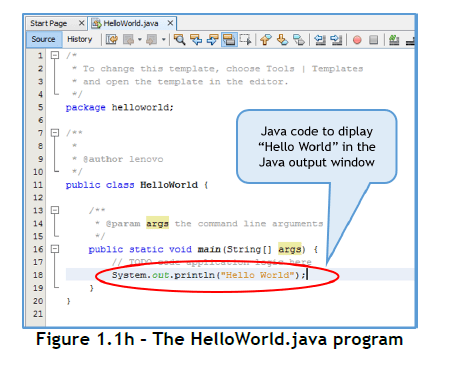
In the program that we are building, we want to instruct the computer to display a welcome message in the Java output window. So within the main method we will write a single line of code that does just that. For this we will use the most common prebuilt Java output method System.out.println().
Step 5: In the Code Editor window, find the line
“// TODO code application logic here”.
Click on the right end of that line. Press Enter and type in the following line of code
System.out.println( “Hello World ”);
Notice that as you type the dot after the word System, NetBeans will display a list of available options (Figure 1.1g).
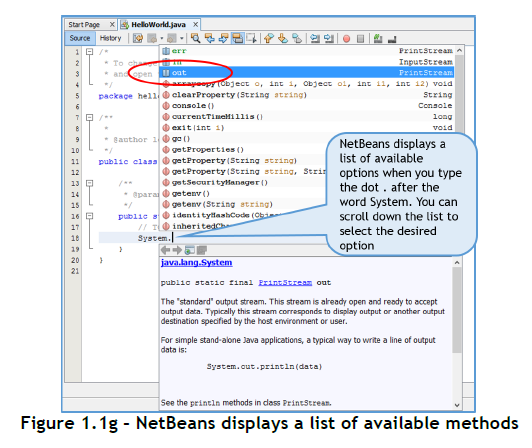
At this point, you can continue to type the word out or alternatively, you can scroll down the displayed list to reach the word out and then either double click or press enter. When you type the dot after the word out, another list appears. Again either select println from the list or continue to type. After you complete the line, your code editor window should appear as in Figure 1.1h.
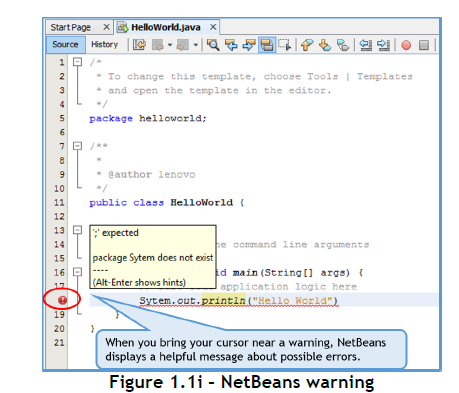
Don’t forget to type the semicolon at the end of the statement. All Java statements must end with a semicolon. If you make any errors while typing your code, for example, if you forget a semicolon at the end of the statement or if you misspell a keyword, NetBeans will warn you with a glyph – an exclamation mark in a red circle, in the left margin of the line (Figure 1.1i). If you bring the cursor near the warning, you will see helpful hints to correct the errors. You can use these hints to correct your errors.
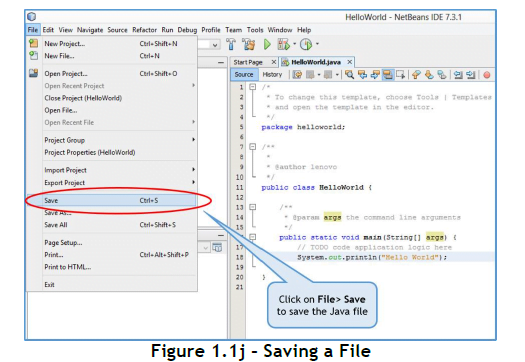
Step 6: In the IDE toolbar, click on File > Save (Ctrl + S) or File > Save All (Ctrl + Shift + S) to save the HelloWorld.java program (Figure 1.1j). Because NetBeans has a default Compile on Save feature, you do not have to compile your program manually, it is compiled automatically when you save it.
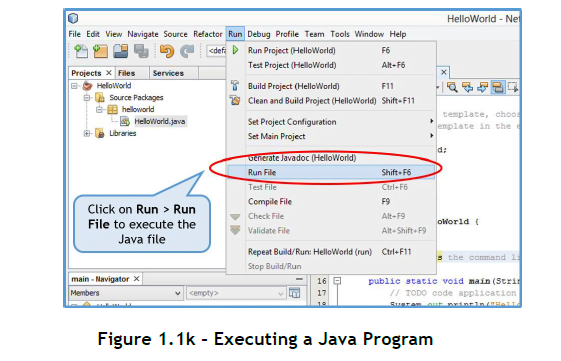
Step 7: In the IDE toolbar, click on Run > Run Main Project (F6) or Run >Run File (Shift + F6) to execute the Java Program (Figure 1.1k).
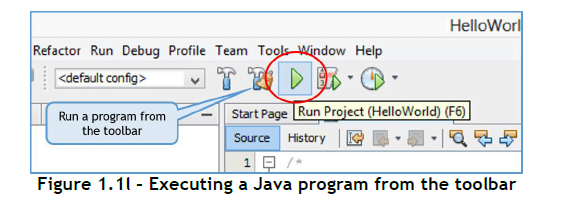
You can also run your program by clicking the green arrow button on the toolbar (Figure 1.1l).
If there are no errors in your program, the NetBeans IDE compiles and then executes your program. You should now see the program output (the “Hello World” message) in the Output Display Window near the bottom of the IDE as in Figure 1.1m.
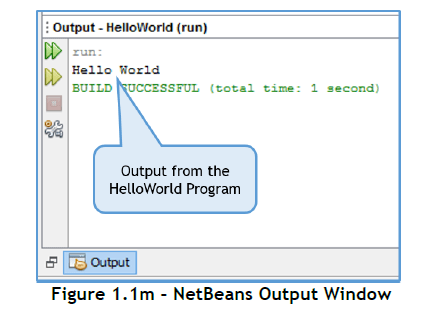
The System.out.println( “Hello World Hello World Hello World”); statement printed the line
“Hello World”
on the screen followed by a newline causing the subsequent line to be printed on the next line. Try changing the program code to
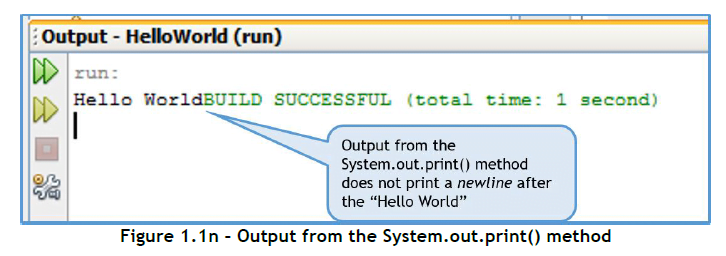
System.out.print( “Hello World ”);
and run the program again. You should see the output as in Figure 1.1n. Do you notice the difference from the previous run? This time a newline is not printed after the “Hello World” causing the subsequent line to be printed on the same line.
So that’s all folks! You have successfully written and executed your first Java Program. Congratulations, you are now a Java programmer!