
Learn Fundamentals of Java Programming “Database Connectivity in Java Programming ” Lesson 27
Database Connectivity
In this section, we will learn to connect a MySQL database to a Java program and get back the results from executing a SQL query on the database. Connecting a database to a Java program is easy with NetBeans since it allows us to connect directly to a MySQL server.
Connecting to the MySQL Server in NetBeans
We first need to configure NetBeans to Register and connect a MySQL Server. Follow the steps below to do just that.
Step 1: Click on the Services tab located on the left side of the NetBeans IDE. Right click the Databases node and select Register MySQl Server (Figure 1.11a).

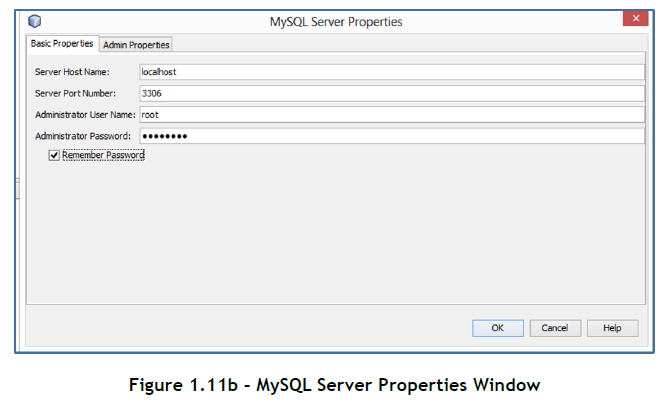
Step 2: In the MySQL Server Properties Dialog Box that opens up, type in the Administrator User Name (if not displayed). Also type in the Administrator Password for your MySQl Server. Check the Remember Password checkbox and click on OK (Figure 1.11b).
Step 3: In the same MySQL Server Properties Dialog Box, click on the Admin Properties tab.
In the Path/URL to admin tool field, type or browse to the location of your MySQL Administration application mysqladmin (you will find it in the bin folder of your MySQL installation directory). In the Path to start command, type or browse to the location of the MySQL start command mysqld (you will find it in the bin folder of your MySQL installation directory). In the Path to stop command field, type or browse to the location of the MySQL stop command mysqladmin (you will find it in the bin folder of your MySQL installation directory). In the Arguments field, type -u root stop to grant root permissions for stopping the server. When finished, the Admin Properties tab should appear similar to Figure 1.11c. Click on OK.

Figure 1.11c – MySQL Server Properties Window (Admin Properties Tab)
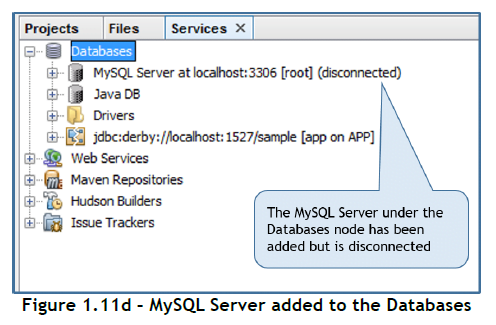
The MySQL Server should now appear under the Database node in the Services tab in the NetBeans IDE (Figure 1.11d). However, it is shown disconnected.
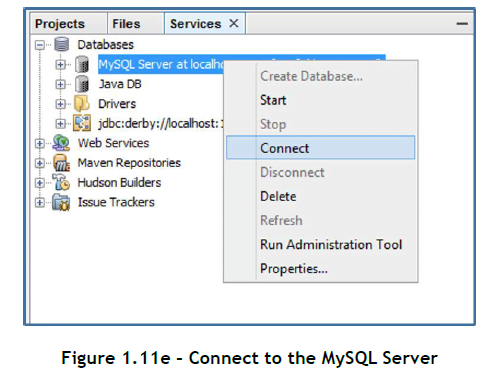
Step 4: To connect the MySQL Server to NetBeans, under the Databases node, right click the MySQL Server at localhost:3306 [root] (disconnected) and select Connect (Figure 1.11e).
Note: The MySQL Server should be up and running before you connect to it through the NetBeans IDE. If it is not, start the MySQL Server by running the mysqld command from the bin folder of the MySQL installation directory. Then, attempt Step 4.
Step5: When the server is connected you should see the [disconnected] removed from the MySQL Server at localhost:3306 [root] database. You should also be able to expand the MySQL Server node by Clicking on the + sign to view all the available MySQL databases (Figure 1.11f).

That completes connecting the MySQL Server to NetBeans.